Color Label Solutions

Color Label Solutions
www.colorlabelsolutions.com

Thursday, February 24, 2022

Color Foils

My parents used often the expression, “You can’t make a silk purse out of a sow’s ear”.  When it comes to art for specialty foils for the LT5C, this expression is especially true.

LT5C Final Print-Color Foils

You may find this post about using various unique materials and white with the LT5C of interest.

If you have requirements to print foils, Kraft or other unique materials, the LT5C is your best option.  Let me tell you more about a recent request from a company with this requirement.

Original Foil Print File

To start this process, a company sent us the pdf file above to print.   As I understand, they send this art to a third-party printer currently; however, they need to move this production in-house given all their SKU’s.
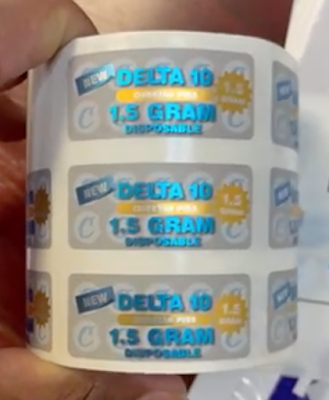
Preprinted Foil Labels

Reviewing their preprinted labels, we noticed a light grey, matte finish, background with blue and gold foils. Given the customer’s requirements for spot foil colors, we needed to find a way to replicate this look on a light grey background.

Although I’m not a pressman, I think the printer used some type of analog press plus foil stamping to achieve both blue and gold foils on the same label. Perhaps they used one of those very expensive presses, but for sure, the printer was not an “on-demand option”.
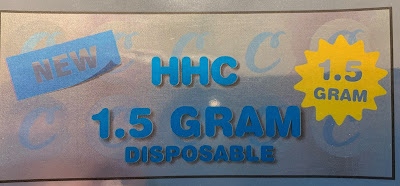
Original Art-LT5C Printed Without White

To start the process, Tony Molina, Graphic Artist for Color Label Solutions, thought the best way to replicate the preprinted label was to use a neutral, high gloss, silver foil.  The Afinia LT5C has the ability to print on all sorts of different media, especially foil media. Tony printed the PDF art file supplied by the customer without any of the white print options available on the LT5C.  But the result was not very good. According to Tony, “the high gloss silver foil color showed through the entire label; making the colors somewhat dull or washed out. Everything was shiny and reflective.  The words “NEW” and “1.5 GRAM” came out silver and not white as they appeared in the pdf file.  Not what the customer wanted.”
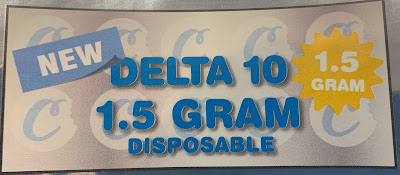
Original Art-Printed With White

One of the options you have on the LT5C is to add white to the background of the entire label. Using this option, all the colors appeared matte and dull.  Again, not what was desired by the customer.

So, in Tony’s opinion, “To get a nice blue and gold foil effect, he needed to redesign the art in a way that takes advantage of the high gloss, silver foil media background as well the white printing capability of the LT5C.  Using Adobe Illustrator, I was able to accomplish the desired results.”

Here is a summary of how Tony built the art file in Illustrator and used the capabilities of the Afinia LT5C 4-COLOR+White Label printer to achieve the requirements of our customer.
White Layer
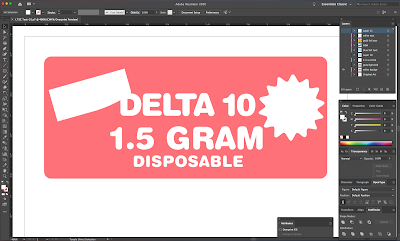
White Layer

First Tony created a layer and assigned the “SpotColor_White” background element covering the entire label except where the foil colors were desired.  Tony chose a “Peach” color as shown on the palette figure below.

Grey Layer
White Layer

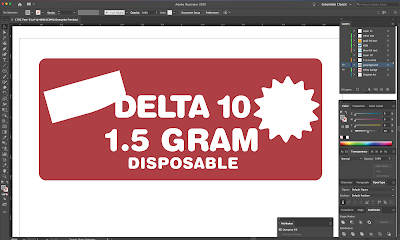
Next he created another layer, copied the same background white element and pasted it in place, and assigned a light gray color to it. He set the light gray color to overprint the white.

White and Grey Layers

The white with the grey layer on top, moved slightly to show both layers.
White And Grey Layers

The grey on top of the white layer (Peach Color) shows up as a darker red in the Illustrator file.
Background Layers With Elements

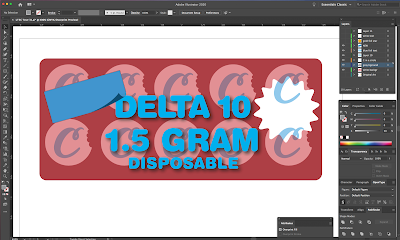
With the background layers finished, Tony added the other design elements without any background.  This method enables Tony to “TRAP” the blue and yellow colors to the background. 

"Trapped" Colors
"Trapped" Colors

Using this method, the blue and yellow colors will print directly onto the high gloss silver, producing the desired blue and gold foil effects required by the customer.

Final White Text
Final White Text

With the background and other elements completed, Tony added the final White text (NEW & 1.5 GRAM) indicated in the Peach Color.  In the top right of the picture above, you can see the list of layers Tony used to recreate the art necessary to print the desired output on the LT5C.

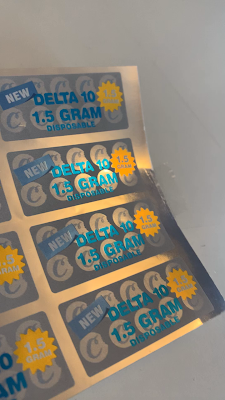
By using a solid, opaque, light gray background with white under print, he created the contrast allowing the blue and yellow colors to become “blue foil” and “gold foil”. 
Final Foil Print Output

Once the art was completed, Tony saved the Illustrator file as a PDF X1-a Standard pdf file.  Then, he configured the LT5C Postcript driver to print with the option “APPLICATION SPECIFIC”; meaning the designated white color elements will print behind a particular color to make the colors pop.  Plus, the white color can be used as an element as part of the overall label design.

To help graphic artists design with white, Afinia has released a design suggestion on using white. I encourage you to review this information before creating or using the LT5C to print any files with white.

Once the “ART FILE” was configured correctly, Tony was able to achieve the desired finished label using the LT5C with high gloss silver foil media.

Blue/Yellow Foils Up-Close
Blue/Yellow Foils Upclose
See it here:


Tony says, “After being able to understand how “WHITE” in your design really works, the LT5C was able to represent very closely the print made from an expensive label press using most probably specific PMS inks.  The fact that we can replicate this print output using a digital printer with a silver foil label is impressive; especially given the requirement for a foil look for cyan and gold/yellow.”

With a knowledgeable graphic artist, silver foil and the LT5C, you can create great looking, color foil labels.  If you want to use various color foil labels on your products, contact us.  We’ll help you get started printing high quality labels yourself.

Guy Mikel
855-962-7670

Thursday, February 17, 2022

Preventive Maintenance

Completing preventive maintenance is key for label printers and accessories.  And now Color Label Solutions can arrange preventive maintenance on your equipment.

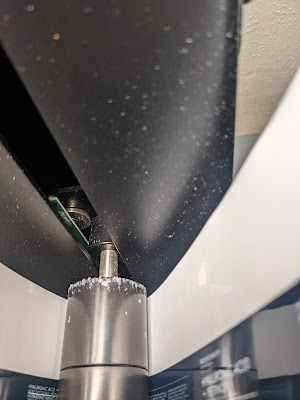
Adhesive/Paper Dust On Damper

I’ve written about preventive maintenance in the past.  With L801 printheads:

and for the C7500 and C7500G:

And I’ve written about our Break-Fix capability

But now Color Label Solutions can offer on-site preventive maintenance on printers and accessories in many parts of the country.

Ink Build-Up Inside Printer

When asked about the need for preventive maintenance on the items we sell, Danny Valles, Support Associate for Color Label Solutions says “Almost all of the hardware items we sell could use preventive maintenance.  For example, the DLF 220S gets a build-up of adhesive on the nip rollers and dancer arms.  Cleaning these items and greasing the unit makes a big difference.  On the L801/L901, cleaning the label dust (especially in and around the service station) and removing any “gunk” will improve print quality and help make the equipment last longer.  On the C6000 or C7500 printers, cleaning up the paper/media path will extend the life of your printers.”

Thermal Transfer Preventive Maintenance

According to Chris Miller, Vice President of Service and Supplies for General Data (our parent company), “We can perform a preventative maintenance on a wide variety of equipment; including thermal transfer printers, direct thermal printers, color label printers, printer accessories, copiers, and workgroup printers.  During this service, we can make adjustments, clean, lubricate, repair simple items, and replace consumable items; all designed to extend the life of your equipment.  Also, preventive maintenance can prevent incipient failures.”

Cleaning Pad
Cleaning Pad

As for pricing of preventive maintenance, Chris says, “we charge an hourly rate for service with a flat rate for drive time.  And we don’t charge per device; therefore, we can work on a lot of devices during the same call making the cost/device very affordable.  We can also set up a preventive maintenance schedule; with maybe 1, 2, 3 or 4 times over a period of a year or two.”

Ink Build-Up
Ink Build-Up

For where can Color Label Solutions provide this preventive maintenance service, Chris says, “naturally, we can provide this service in Southern California.  However, we can now provide this service in most metropolitan areas of the US.  Contact us to see if your location is covered by our service techs.”

To arrange a preventive maintenance service or to get an estimate of the costs, contact Chris Miller in our Signal Hill/Long Beach office at 855-962-7670.  Or email chris@colorlabelsolutions.com.  I’m glad that we can offer this type of service to our customers.

Guy Mikel
855-962-7670
Wednesday, January 26, 2022

Hinge Labels

I’m pleased to announce the availability of new label technology; 2-Ply Hinged Labels.

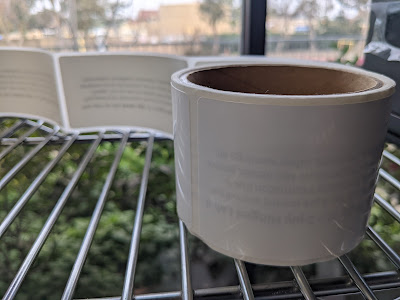
Inkjet Coated Hinge Labels

Or what I would describe as a simplified, booklet label.  Let me tell you more about this exciting new development.

Inkjet Coated Hinge Labels

According to the plant, a 2-Ply Hinge Label is a preprinted label laminated to a standard inkjet coated label on top; with one side connected.  With this configuration, you can open the top up to expose the preprinted information underneath; but can’t completely remove the top.  Once read, you can lay the top label back down on top of the preprinted information.  That’s why I describe it as a simplified booklet with 1 page of preprinted information.

Booklet labels are part of the Extended Content Label (ECL) category. They’re used to pack extensive information into a small label area so you can achieve maximum branding impact. In addition to creating many label design opportunities, ECL’s can help reduce costs by allowing you to use a smaller label than otherwise possible.

Blank Hinge Labels
Blank Hinge Labels

The plant says they can print any standard art file (colors, images and text) in the booklet section of the label.  Currently, they are working only with an inkjet coated matte poly laminated on top of a poly preprinted label underneath.  Also, we can get these Hinge Labels made using BS5609 matte poly.  One more point; they are developing a technology of paper on top of paper as well.

As these labels are “two ply”, they are thicker than standard matte poly.  However, the total construction thickness does not prevent their use in the inkjet printers we sell.  Also, the price of these hinge labels is higher than a standard matte poly; and does require preprinting the art during manufacturing.

Printed Hinge Labels

After receiving the samples of these Hinge labels, I asked our Technical Support Specialist, Danny Valles, to test print them in a C6500A printer.  According to Danny, “these hinge labels print as good as our standard matte poly materials.”

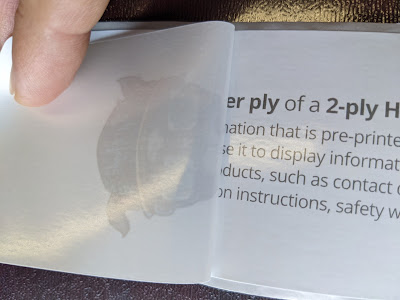
Preprinted Section; Hinge Labels

Continuing, Danny says “You can’t pull off the top section of the labels as they are connected on one side; that’s why the name hinge makes sense.  It’s like a door hinge that you open and close.  It’s a bit “sticky” to peel off the top, but it works fine.”

Printed Hinge Labels

From my perspective, it was great to see that this new technology still prints great.  Danny says, “the labels dry instantly just like our standard matte poly.” Now, our customers can print variable information and images/colors on top; while embedding static information inside the booklet section of the labels.  It’s a great way to manage a large number of SKU’s that have the same safety or other information that needs to be included in/on the label.

Printed Hinge Labels

I do believe this new technology could help change the on-demand color label printing business; making it fit many more of our customers with lots of SKU’s.  Cannabis, pharmaceutical, chemical and other manufacturers should find this new development makes their operation run smoother; and their brand development more valuable.

If these Hinge or Simplified Booklet labels could fit your business, contact us to learn more.  If you send us the artwork needed to be preprinted, the exact size and volume wanted, we’ll send you a quote.  And get you started making even better labels for your products.

Guy Mikel
855-962-7670

Monday, January 17, 2022

C4000 Launch

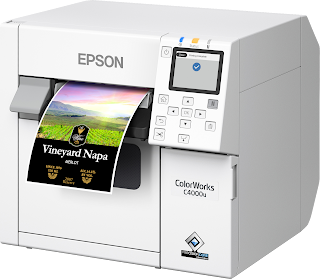
Epson announced this week the new replacement for the 8-Year Old, C3500 Color Label Printer; the C4000.

C4000 Replacement For The C3500

Read about the new C4000 from the Epson press release here.

And the webpage for this new printer.  And overview video here.


This new printer will offer several key features that I believe will fit many of our customer’s applications.  In this post, I’ll review the 5 key features as I see them; and present who should consider this new printer.

5 Key Features

C4000 Improved Print Quality

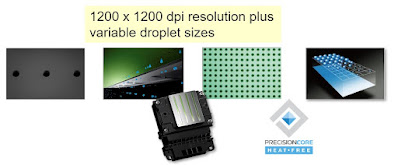
First, the most important feature of the C4000 compared to the C3500 is improved print quality.  The C4000 will offer up to 1200 x 1200 dpi print; much higher than the C3500 which offered up to 720 x 360 dpi.  More importantly, the C4000 will offer significantly higher print quality than a very expensive, 600 dpi thermal transfer printers such as the ZT610 which can cost over $4,000.  Or even a less expensive, lower dpi printer such as the ZT410:

C4000 Print Quality Comparison

In addition to the improved font print quality (even on plain paper above), the C4000 offers plug and play into ZPL.

Easier to use compare to thermal ribbons; ability to print color codes and images; more durable images; and probably lower ink costs especially compared to resin or resin/wax ribbon costs.

C4000 Remote Device Management

Second, the C4000 will offer Remote Device Management capabilities. For larger, multi-site deployments, device management will save Operations and/or IT time enabling them to Configure all printers, Check Printer Status, Update Firmware and Create Alerts.  This device management capability will save large organizations significant time and money ensuring their label printers are running as required.

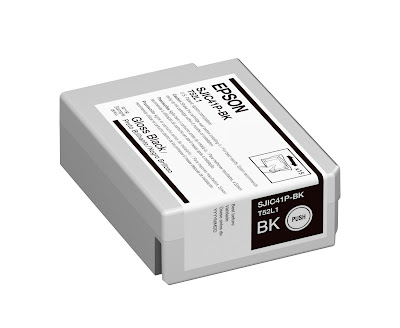
C4000 Larger Ink Cartridges

Third, the C4000 will offer larger ink cartridges; 67% larger than the C3500. These larger cartridges will increase the label yield per cartridge; and thus, reducing the number of cartridge changes.

C4000 User Replaceable Cutter

Fourth, the C4000 will offer user replaceable cutters. User replaceable cutter will save users (and us) time and money.  No more sending in a printer to replace the cutter.

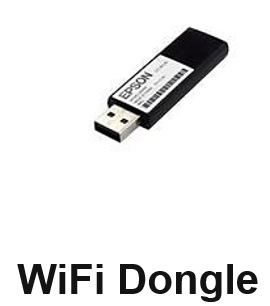
C4000 WiFi Capability
C4000 WiFi Capability 

Fifth, the C4000 will offer WiFi connectivity.  No other color label printer we sell offers this capability.  I can see many operations connecting to the C4000 via WiFi.

The C4000 offers other features that you may find of interest (i.e. small footprint, durable ink, etc.), but the 5 features mentioned above will make the C4000 a very valuable tool in your operation.

3 Potential Applications

Electronics Manufacturing Labels

As to whom should consider the C4000, I see 4 key uses.  First, manufacturing operations that need to print high resolution and durable text/fonts. Up to now, most manufacturers used a 600 dpi thermal transfer printer for these applications.  Now the C4000 will save money and produce even higher quality print. Many Medical or Electronic manufacturers would seem to fit into this category.

Color-Coded Labels
Second, manufacturers who want to add color codes or images to their labels.  Or even the combination of colors and images

Color and Images
Color and Images

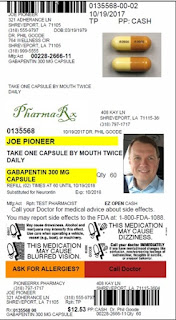
These types of labels maybe important in health care; in compounding and regular pharmacies for example.  For example, pharmacy labels.

On-Demand Color Pharmacy Labels

 
The C4000 would print these types of labels and tags easily; and affordably. 

On-Demand Color Badges

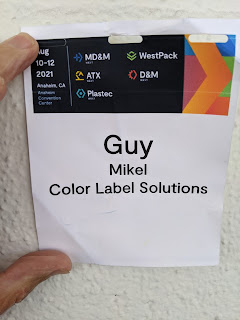
Third, tradeshow/registration operations should consider the C4000 for their badges. The higher print quality makes attendee pictures much better for identification and to prevent pass along.  Device management capability makes operation of these devices much easier for larger deployments; such as CES.   

On-Demand Color Food Labels

And fourth, Food Retailers who need to print a simple logo and variable data on prepared meals labels; such as retail outlets. The affordability combined with the Remote Device management capability makes the C4000 a great option to print color labels on-demand in retail stores.

One area that I would not recommend the C4000 is for any manufacturer printing full-bleed labels.  The C4000 uses a similar media handling as the former C3500 printer.  For anyone printing full-bleed, I’d recommend the C6000 series printers instead given the more precise media handling/feeding which makes printing to the edge more precise.

Further, I’d recommend the C6000 series over the C4000 printer to anyone printing circle labels as well.  The C6000 series offers a movable blackmark/gap sensor, eliminating the need for marks preprinted on the labels.  This feature saves money and makes circles easier to print.  

New C4000 Color Label Printer

According to Epson, the C4000 will become available in the Spring of 2022; with a price of $1,750.  Place your advance order for theC4000 printer here .  And ink here. See our main page for the C4000 here. 


Once ordered, we’ll get one reserved for you with Epson.  And be sure to watch for more information from us on the new C4000.

For us, we find new color label printer technology exciting; especially when it replaces an eight-year old printer like the C3500.  If you are interested in the C4000 label printer, contact us to learn more or to place an advance order.

Guy Mikel
855-962-7670

Monday, January 3, 2022

Designing Labels

Recently, I came across an article that would seem to fit almost all of our customers in the label business; How To Design A Label; the Ultimate Guide.

Designing Labels
How To Design Labels

In the past, we’ve posted about several aspects of label design.  For example, our graphic designer, Tony Molina’s work designing label and logo art for one of our customers.


Raster vs Vector; When To Use What Type of Art.


But we’ve not provided a How To approach to designing a label from scratch.  The “How To Design A Label” article provides good ideas for those of us who need to create labels.

After reviewing the article, I found three key steps you should complete when designing a label.

First, consider writing a “Creative Brief”.  This document should describe the technical and aesthetic requirements of the label.  Basically, a document to hand over to a graphic artist.  This type of summary helps contemplate all of the elements needed in the label design.

In the Creative Brief, make sure you add the specific requirements needed in the label.  Some examples include the following.

Package and Label dimensions.  We get customers every day contacting us with no idea of the size of label required.  Make sure you know the packaging type and label size required.  Many times, I recommend considering a label size with whole integers (i.e. 2” x 1”) may fit your product.  These standard sizes are more readily available and generally less expensive.

Printer Technical Capabilities. Many times, people contact us wanting to produce the same type of labels from an on-demand, 4 color printer that they purchase from a company using million-dollar presses.  By understanding the capabilities of an on-demand color printer, graphic artists can create designs that produce the best possible print output; regardless of the price of the printer.

Logo’s, Brand Colors, Certifications and other Icons.  Be sure to include all images and colors needed to complete the desired label look.

Nutritional Facts, THC/CBD Content, ingredients, or other specific content as we as any table of information required.

Front, Back, Top, Neck, Security label sizes/types/materials needed.

Barcode and QR code data.  If selling through a retail channel, a GS1barcode may be needed.

Find more information on creative briefs of all types here: 


I asked our Graphic Artist, Tony Molina about developing a “Creative Brief”.  Tony says, “I want to learn as much information about the product as possible; Including who is the target audience or preferred sizes.  Also, I ask customers for samples of existing labels they like. I want to see the label so I can get a feel for what the customer has in mind. If the company has a particular color scheme, I could integrate those colors in the design as well.”

Second, document the Branding Direction of your product.  This effort ensures the label design visually supports the “Product Position” and/or the product strategy. Logo’s and branding style are important elements of the Branding Direction.  In addition, companies with multiple brands should want “Brand Consistency” across their product line.  In this post, 60 different label designs are presented to provide ideas.  Although all of the products are consumer oriented, it may give you creative ideas for labels. 

Label Design Ideas


For Branding Direction, Tony recommends, “Have a color scheme in the label design that reflects your product positioning. Your logo should be clean and easily recognizable. Label content should be well balanced and uncluttered. Maintain label style/consistency throughout the product line.” 

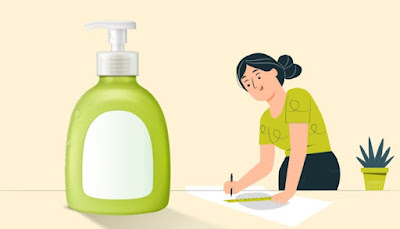
Third, mock up your product using the label design and packaging.  This step is important to ensure the label design (2D) works on the product package (3D). On-Demand Color Printing of continuous labels and then hand-cut to size makes this step easy to do for anyone with a printer.  Although not within my capabilities, graphic artists should be able to create electronic version using software such as Photoshop to create realistic images of the finished product as well.

Following these three steps should help you create label art that fits your products and works well with on-demand color label printers.  By adding one more step (Contacting Color Label Solutions), you’ll create great looking labels that your customers will approve.

Guy Mikel
855-962-7670