After working
with inkjet label printers for many years, one thing I’ve learned is that
inkjet printer nozzles will occasionally plug.
 |
| L801 Printhead Streaks |
I’ve written about preventing plugged nozzles on the C7500 printer:
And I’ve
written about the costs of consumable printheads with the Kiaro printers:
But I’ve not
written about what to do if a L801 printhead nozzle gets clogged; or how to
prevent clogged nozzles on these printers. This post is designed to help L801
users (and users of any similar Memjet-based printers; Afinia L701, Afinia L901,
VIP 650, VIP 700, etc.) prevent clogged nozzles as well as explain what to do
if nozzles get plugged in the printhead.
 |
| Afinia L801 Label Printer |
Keeping L801 Printhead Working
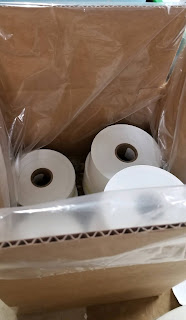 |
| Label Rolls Packed In Plastic Bags |
The number one
recommendation to keep your L801 printer free of plugged nozzles is to keep
your labels clean and in the original packaging as well as the room in which
the printer sits clean. Most of the
material that plugs inkjet nozzles comes into the printer from the label
media. Generally, label rolls are
shipped inside a plastic bag; and inside a box.
Keeping the rolls inside the bag limits the amount of dust that gathers
on the roll; and prevents humidity from affecting the quality of the labels as
well. Keeping the room generally clean limits
the dust in the printers as well.
Limiting the dust into and on the L801 printer is a good idea to keep
your printhead working as long as possible.
 |
| Maintain Humidity |
Number two;
maintain sufficient humidity in the room with the L801 to prevent the nozzles
from drying out. Memjet, the maker of
the L801 print engine recommends a minimum of 45% humidity. This recommendations can make a big difference; especially in dry climates and during the winter months.
Number 3: Keep
the L801 powered on if you use it within 6 days or less. By keeping the printer on, the printer
services the printhead; running ink into and through keeping the nozzles
moist. If the printer will not be in use
for 7 or more days, remove the printhead following the directions and place it
in the orange shipping cup in distilled water.
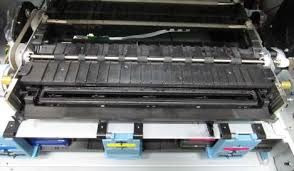 |
| L801 Media Path |
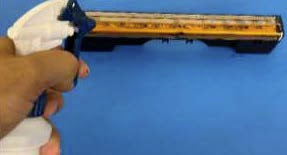 |
| Clean L801 Printhead |
Number 5: Clean
printhead manually occasionally. Use
distilled/deionized water on a lint free cloth to wipe the printhead after removing
it from the printer. Never touch the nozzles with the moist cloth,
however. Wipe in one direction with the
moist cloth. To remove the printhead, select Configuration, #3 Printhead, #2
Replace on the Control Panel.
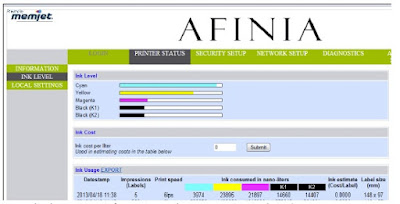 |
| L801 EWS |
Number 6: Change
Servicing Level. Change the “Mid Job Servicing Interval” to Maximum in
the toolbox under "Advanced Settings 1". This setting will allow the
head to service more frequently which reduce the likelihood
of plugged nozzles. (See table 2 in the L801 User Manual on page 36).
Number 7: Check
Unused Nozzle Setting in the Embedded Web Server (EWS): Check to make
sure the setting "Keep unused nozzle wet" isn't disabled.
This setting is in the Advanced Settings 1. (See table 2 in the L801 User
Manual on page 36).
The seven recommended
steps/procedures will help keep your printhead functioning properly and as long
as possible. Do what you can/when you
can to follow these recommendations as much as possible.
But sometimes,
you can get a plugged nozzle even following these recommendations. If you do find streaking from a plugged
nozzles, follow these recommendations.
 |
| L801 Control Panel-Clean Printhead |
First, complete
a normal clean. From the LED, select
Configuration, #3 Printer 1, #1 Clean and then Normal. Then complete another print to see if the
streak remains. (See page #52 of the L801 User Manual).
Second, if the
streak remains, complete an Extended Clean (follow above directions selecting
“Extended”).
Third, if
streak remains, clean the printhead following the directions above. In addition, clean the PRINTHEAD
Contacts. Turn off the printer, and wipe
the contacts in a vertical manner using a moist lint free cloth.
Fourth, if the
streak remains, you may decide to complete an Extreme Cleaning. However, select this option carefully as it
consumes a lot of ink. Generally, I
recommend the next step in advance of the Extreme Cleaning option.
 |
| Soaking L801 Printhead |
Fifth, soak the
printhead overnight in distilled water.
Fill the orange cup in which the printhead ships with distilled water
and then placed the printhead in the cup.
This step rehydrates the printhead. Plus, it’s a good way to store the
printhead if the printer is not in use for more than 6 days.
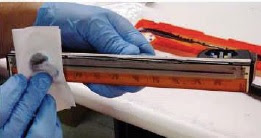 |
| Wipe L801 Printhead |
Sixth, wipe
nozzles as mentioned above using a moist, lint-free cloth. Wipe in one
direction with no pressure. This step
may rehydrate the plugged nozzles.
If none of
these steps fix plugged nozzles, then a new printhead is required. As the printheads are a consumable item,
replacements are required occasionally.
In addition to
plugged nozzles, I’ve learned one other item may cause streaking. As the printhead ages, lines may appear approximately every ¾” along the web where the zones of the nozzles meet. These lines are referred to as “Die
Lines”. These die lines are most
noticeable in light, pastel or sky-blue colors. In addition, these die lines
appear more on certain materials. For
example, gloss BOPP has very little “Dot Gain”; meaning the ink stays in a
tight, small dot which makes the die line more likely to appear. On other materials such as paper, the ink
migrates or spreads out evenly; potentially overlapping the other dots,
reducing the likelihood of a die line effect.
Over time, these die lines can’t be fixed and require a new printhead. Following the recommends on maintaining the
printhead will make this consumable item last as long as possible.
By following some
or all of these recommendations, you can maintain your L801 (and related
Memjet-based printers) printheads and potentially, unplugged nozzles. Knowing and following these steps will reduce
the possibility of streaks in your label printing.
Contact us if
we can help with your L801 or any other label printer.
Guy Mikel
855-962-7670

No comments:
Post a Comment