FYI: I received my first C6500P printer.
 |
| C6500P In The Box |
As I tested this exciting new technology, I thought you might find my
out-of-the-box experience of interest. You might find my introductory post on the C6000 series printers of interest:
Once initialized, I checked the firmware version to see if it was
up-to-date; it wasn’t. It is not
surprising as these printers are brand new to the market. Epson has the updated firmware on the same
site as the driver above. After
downloading the firmware, I installed the updated firmware.
 |
| C6500 Firmware Update |
I found the firmware update process very similar to my inexpensive, Multifunction,
WF-4720, Epson printer.
 |
| C6500 Media Spindle |
For the matte paper, I selected the normal quality setting;
 |
| C6500 Media Settings |
In addition, I changed the Ink Profile in the Advance setting to the
darkest setting. I’d recommend this change
on most all artwork and applications.
 |
| C6500 Ink Profile |
Finally, be sure to configure the settings to “Rewind” if you are not
using the Peel & Present feature:
 |
| C6500 After Print Settings |
Otherwise, the printer will tell you to remove the label. If you don’t change this configuration, the
next label will not print. You can move
the label slightly and the next label will print.
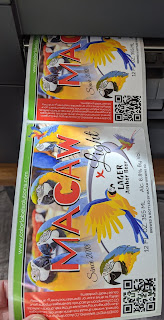
And found the print quality and speed (about the same as a LX2000) very
good.
 |
| C6500 Matte Paper Labels |
After my first print jobs, I loaded some gloss paper and printed both
at the Quality and Max Quality. I did
notice a slight difference in colors; but very little. Notice the differences in the green bar; and
maybe the red block. Frankly, I don’t
think that vast majority of users will use the Max Quality setting.
 |
| C6500 Gloss Paper Labels |
Now that I was printing labels, I tested the Peel & Present feature
on the C6500P. I changed the
configuration in the driver to “Manual Apply”; and loaded the liner through the
peeler. The Peel & Present worked
great!
 |
| C6500P Peel & Present Feature |
No other color label printer offers this feature. If you have operators on the line printing
and applying labels by hand, this feature will increase productivity. Please know: the Peel & Present version
does not have a cutter.
After using the Peel & Present feature, I tested the new Spot Color
replacement capability in the Epson driver.
With this capability, the printer can change one color
automatically. In the Printer Setting
Utility (Stored Data section), you establish an RGB value to replace an
existing color.
 |
| C6500 Spot Color Setting |
And then you select the color in the media definition section of the
driver:
 |
| C6500 Spot Color Driver Setting |
And you can change the print output colors without changing the
artwork. See how the blue block below
has a different color. Again, no other
printer I know offers this capability.
 |
| C6500 Spot Color Replacement; Check out the Blue Differences |
This feature seems to work only with artwork created as RGB, and not
CYMK. More to come on the Spot Color
Replacement.
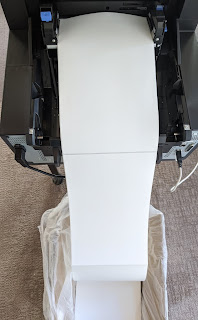
After all these tests, I want to try rear feed using very large drum
labels; 8.375” x 13.875”. Again, I see
the C6500P as a perfect replacement for the C831 printer. With large labels and rear feed, opening the
media cabinet from the back was very convenient.
 |
| C6500 Rear Feed of Large Labels |
And using the Synthetic setting at the Normal Print Quality, I found
the print speed faster than expected; probably faster than the C831. Watch me
print this long label here:
And the print quality as well better than expected with the C831.
 |
| C6500P Print Quality on Drum Labels |
After testing these large drum labels, I wondered how well the Peel
& Present feature would work on 8.375” x 13.875” size. Peel & Present seemed to work well.
 |
| C6500P Peel & Present-Large Drum Labels |
Contact us if you find the features of the C6500A or C6500P of
interest. We’ll make printing with these
new technology printers easy to do.
Guy Mikel
855-962-7670
info@colorlabelsolutions.com 

No comments:
Post a Comment