Color Label Solutions

Color Label Solutions
www.colorlabelsolutions.com

Thursday, May 31, 2018

Inkjet Coated Kraft


All the time, we get requests for Kraft paper labels. 


However, I’ve found these Kraft labels to print poorly with inkjet printers.  The primary reason for poor print quality is that the ink will migrate/spread on plain paper.  This migration or spread makes the print quality look “fuzzy” and frankly, not good.  Wish I had a closeup picture; so hopefully you can imagine what I mean.

Almost all of the labels we sell have an inkjet coating.  This coating adheres the ink to the surface of the label, preventing the ink from migrating/spreading; and making the ink bind to the paper stronger.  For example, inkjet coating enables us to sell durable, poly labels that meet the BS5609 requirements.  To meet the requirements for the marine shipment of chemicals, printed labels must survive in the ocean and resist server abrasion testing.  Learn more about BS5609 from these older posts here: 


Now we have just launched a new inkjet coated Kraft paper label that prints great!
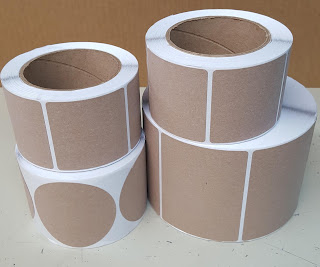

Inkjet Coated Kraft Paper Labels
When we received the new inkjet coated Kraft paper, we printed the material using a relatively low-resolution artwork. 


C3500 Printed Inkjet Coated Kraft Labels
And compared it to our standard matte paper:

Matte Paper vs Inkjet Coated Kraft Paper Labels

From our print tests, we found the print quality of the new inkjet coated material much better than traditional Kraft paper labels and almost as good as our standard matte paper labels.

Once tested, we sold it almost immediately to a customer, Kristy of Blue Rock Acres. 

http://bluerockacres.com/


When asked why Blue Rock Acres was interested in a Kraft paper label, Kristy said, “The company was looking for a label that would distinguish our A and B Brands. We went with Kraft-backed packaging for the new B brand and thought the look should carry over to the label as well. We wanted a brown bag appearance, a wholesale or low-price vibe, while still being eye catching to the consumer. I think the Kraft labels capture this extremely well and I am very pleased with the new labels.”
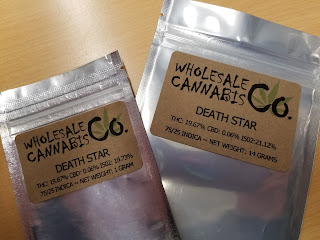

Blue Rock Acres Printed Labels

Considering these labels were printed with a relatively low-resolution C3500 printer, I think they look great!  According to Kristy, “The new Kraft labels look great and print great, including small print disclaimers and barcodes! Just the look we wanted.”

If you are looking for vintage or brown paper look for your labels, consider our new inkjet coated Kraft paper.  You’ll find these labels print great; and convey the desired brand image.

Guy Mikel
855-962-7670


Monday, May 28, 2018

ZPL With The C7500


Recently, I had reason to practice printing ZPL to a C7500.

ZPL Datastream Printed With The C7500

Let me tell you more about to use this capability in the Epson C7500 printer.


Before I begin, you may be asking what is ZPL?  Zebra Programming Language (ZPL) is the command language used by all ZPL compatible printers. It is a command-based language used by the printer as instructions for creating the images printed on the labels.  Although I can’t find the history of ZPL, Zebra Technologies changed it’s name in 1982 to focus on thermal transfer printers; and was probably using a version of this language at that time: https://en.wikipedia.org/wiki/Zebra_Technologies.   Sato claims to have invented thermal transfer technology with the launch in 1981:  https://en.wikipedia.org/wiki/Thermal-transfer_printing.  Before Windows, desktop printers used a print language.  And many of Zebra’s competitors offer ZPL emulations or interpreters.

From my perspective, ZPL offers a few key benefits; primarily speed and legacy installed base.  With ZPL, the application sends only the variable data to the printer; making time to first print very fast.  By using a preprinted label or uploading a template, you can embed non-variable objects onto the label.  In addition, developers have created applications for decades that use ZPL to print; and Zebra has sold millions of printers to customers who use these applications.

To print a Zebra ZPL print stream using the C7500, you have two options:
  • Use a Generic Text Driver
  • Use LPR from a command line


To use a Generic Text Driver, you need to add it to your system.  I found the instructions here on how to add this driver: https://dfarq.homeip.net/how-to-add-a-generic-printer-in-windows-10/

Once added, you need to select it to replace the standard C7500 driver on the Advance Tab.

Generic Text Replacing C7500 Driver
Once the driver is installed, you need to change the resolution of the printer.  For the ZPL print stream I had, I needed to change the Resolution in “Printer Setup 1” to 200 dpi.  To make this change, go to Menu on the front panel, page down to select “Printer Setup 1”, page down to select “Resolution”, and then use the arrow keys to select 200 DPI.  Be sure to remember to change this setting back to 600 dpi when finished as well as select C7500 on the Advanced tab in the Driver setting.

To print the ZPL stream, I then opened the ZPL code in Notepad:

ZPL Printstream in Notepad
And printed to the C7500 using the Generic Text Driver.  Worked perfectly.

ZPL Printed Using The C7500

To print using LPR, I found this page seemingly straight forward on how to use this capability:  https://www.cups.org/doc/options.html.  (Full Disclosure:  I never actually used this method to print).  Experts with Linux should find these instructions easy to follow.

Actually, printing the ZPL is the easy part.  I found the uploading and creating the correct image template much more difficult; but figured it out.

On page 98 of the C7500 Operators Manual, you’ll find the instructions on how to select a background image to print.  Get the manual here:   https://files.support.epson.com/docid/other/m00079108.pdf

C7500 Background Image Settings


One key aspect I missed was the last sentence in the initial paragraph: “This setting screen is not displayed if you started the Printer Setting Utility from the printer driver”.  It took a call to Epson Advance Tech Support (562-276-1340) to figure out why I could not see the “Background Image Setting” option.  Once I understood, I downloaded and installed the printer setting utility as a separate application.  You can download this utility here:  https://download.epson-biz.com/modules/colorworks/index.php?page=single_soft&cid=346&pcat=35&pid=5.

Once installed as a separate application, I could select the “Use Shared Background Image”.

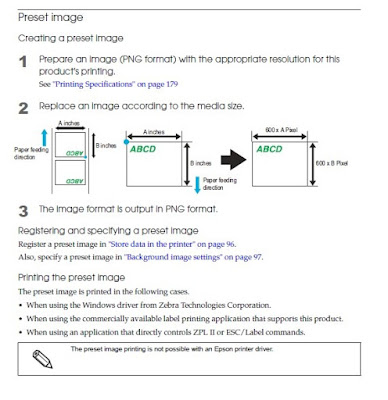
To create your background image, follow the instructions on page 99 of the C7500 Operators Manual:
How To Create Preset Image To Upload To A C7500

Key aspects are 1, must be a PNG format.  And 2, you need to create the image using the correct X/Y settings based on the label media size you are printing.  Once you have the correct image created, you can upload it following the instructions on page 98.
Upload Background Image To C7500

Once uploaded, the image prints in color whereas the ZPL code is printed black:
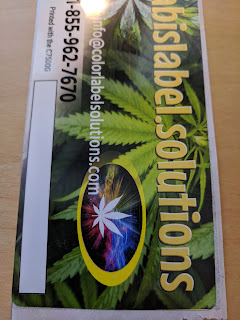
Color Image on ZPL Printed With The C7500

(FYI: I did not take the time to fix the image as the correct size or location.   But it printed!)

Over the years, I had several individuals talk about the ZPL feature of the C7500.  But I never had a company put this feature into operation until now.  With legacy applications, the ability to print native ZPL is an interesting feature of the C7500; especially with the ability to upload images completely eliminating the need to purchase preprinted labels.

If you are interested in using ZPL, contact us.  We’ll help you get started printing quickly.

Guy Mikel
855-962-7670

Sunday, May 6, 2018

Get Your Matrix On


Printing full-bleed correctly can be tricky using die cut labels. 

Full-Bleed Label Printing

The problem is you want the ink to cover the edge of the label but not put too much ink on the exposed liner.  If ink goes onto the liner, you can transfer it to the actual label during application or rewinding.  Or you can’t quite get the label printed without leaving some white on the label.

Full-Bleed Label
Full-Bleed Label
 In the past, we’ve tried inkjet coated liners that work perfectly:  http://colorlabelsondemand.blogspot.com/2017/02/full-bleed-label-media.html

But are expensive to use.


And I’ve written about using a finishing system post printing.  Here is one option I saw at Label Expo:

Using a label finishing system is great if you are willing to invest in the equipment and change your process to print and then finish (laminate, die cut, weed the matrix and rewind) the labels.  Many companies don’t want to take the time or effort to complete this process.  But a finishing system produces prefect laminated, die cut labels each time.

One last option to produce full-bleed labels involves using slightly different die cut labels; leaving the matrix on.

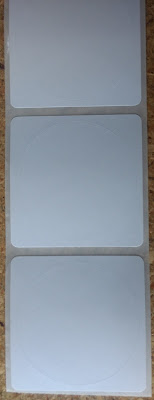
Matrix On Circle Labels

In the above picture, you’ll see die cut circle labels; but you’ll also see the matrix left on around the die cut forming a rectangle and gap between labels.  With the matrix left on, you can print beyond the die cut label without having to working about the ink transferring.  Works great to produce full-bleed die cut labels.

However, you can’t use labels with the matrix on for label applicators; they will not peel correctly with the matrix left on.  And I’ve been told that labels with the matrix on are more difficult to peel and apply by hand.

To make matrix on labels easier to apply and work with label applicators, DPR has launched an inline matrix remover integrated with the C7500.  Watch this new device work here: 
https://www.youtube.com/watch?time_continue=47&v=cIt4yoOYNQE 

And learn more about this system here:  
https://www.dpr-llc.com/en/label-unwinder-rewinder-epson-C7500.html


Now in one step, you can print full-bleed labels completely; and then remove the matrix to have finished die cut labels.  If you have full-bleed artwork and use an applicator/find it difficult to peel and apply labels by hand, the DPR C7500 in-line matrix remover may work for you.  Contact us to learn more and discuss how this new device may make your workflow more productive.

Guy Mikel
855-962-7670
info@colorlabelsolutions.com