Pages

Sunday, July 30, 2017

1" Solution

This week something happened that makes me want to “blow our own horn”.  Maybe we’re boasting, but I’m very happy by how we supported a client this week.  Let me tell you more.


1" Labels-Print & Apply
We’ve been selling to several customers 1” wide labels for printing with the C7500 and C7500G.  What makes this fact interesting is the minimum print width on the C7500G is 2”.  Please see this post for more information:


For this customer, we created a 1” label centered on a 2” liner.  And it worked perfectly.

1" Wide Label-2" Total Construction
In addition, this customer uses basically all black artwork.  And black is the most difficult color by far.  Here is what we’re recommending for all black labels:


After several months, the customer purchased an automatic label applicator from Label-On; The Label-On Mini 500 Tabletop applicator:


This applicator, however, would not allow us to account for the .5” liner on the “bottom” side of the label.  Normally, exposed liners are approximately only 3 mm or less.  Attempting to apply the 1” labels centered, we would have place them above the start of the taper on the bottle.  Therefore we had to move the label from the center.

To make this change, we changed the die to make the labels, placing it on one side; and making the exposed liner basically on 1 side.

1" Wide Label-One Side Justified
It was very difficult to come to agreement, however, on which side to place the label.  We had to account not only for the applicator placement of the label, but also the fact the labels would be rewound to place on the applicator.  It may not sound complex, but this requirement led to a great deal of discussion.  And some worry on my part.

Once the labels were manufactured, our customer tested them; and found the labels did not print at all correct.  They were still centered on the 2” label.  Frankly, I had forgotten to tell the customer of the need to redo the artwork.  Tim, our Support Manager, figured this out quickly. But was still “nerve-wracking” for me.

To support our customer, we quickly recreated labels the labels adding the extra liner and bleed.
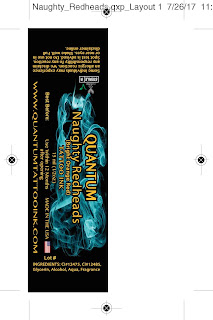
1" Wide Label PDF- 2" Total Construction
Once we had the new artwork, the label printed close to perfect; we had to move horizontally the label to print full-bleed.  A slim line of white was exposed on one side.  Using the horizontal alignment feature in the C7500G driver and changing slightly the media size, the label printed perfectly.  And the rewinder worked as expected.  Watch us print and rewind here:


More important to me, the label worked on the applicator:

C7500G Printed 1" Wide Label Applied By Applicator
Watch the Mini 500 Tabletop apply these 1” labels onto the bottle perfectly.


Reading this post, it may not sound like much.  But getting this label design to work correctly was a lot of effort.  And I appreciate the patience the customer showed during this process.

If you want to print 1” wide labels or any other difficult or special color labels on-demand, contact us.  We’ll help you create the solution that meets your requirements.

Guy Mikel
855-962-7670

Sunday, July 23, 2017

No Risk Label Printing

This post is from guest blogger, Tim Semic, Support Manager from Color Label Solutions.

Would you like to provide a way for your employees or vendors to print labels that meet your exact specifications without the risk of accidentally making changes? 

How about printing labels from multiple computers? 


Printing labels from a web browser?  Even across the internet?

BarTender Print Portal
 If so then please read on…

Seagull Scientific offers two Bartender companion applications that enable you to print labels from a simple read-only interface.  Those applications are Bartender Print Shop, and Bartender Print Portal.

The user interface is basically the same between the two products, while the configuration is more complex for Print Portal.

Bartender Print Station is bundled with every edition of Bartender, while Bartender Print Portal is only bundled with the Enterprise-Automation edition.

Print Station provides a mechanism for printing labels within an easy to use read-only interface.  This configuration prevents employees accidentally changing or deleting labels.  Consequently, some companies may wish to have a “design" computer using Bartender Designer, and then another computer or two set up for print-only label printing.

BarTender Print Station
Print Station can be configured for full-screen and secured; effectively turning a computer into a print kiosk.  This type of kiosk would be great for printing badges, shipping labels, or static labels in a secured computer interface.

To learn how to configure Print Station, watch this video:

Configuring BarTender Print Station 

Print Portal offers different options for risk free label printing.  Elizabeth Sinclair of Seagull Scientific says, “Print Portal includes many features that make locating and printing documents quick and easy. Running on a web server, BarTender documents are available from any computer connected to the internet. With built-in security measures, administrators of Print Portal can require users to login to the site, and assign user permissions granting access to specific documents on the server. Print Portal's intuitive interface lets users quickly locate the document they need to print and send it to the printer with a simple "click" operation.”

BarTender Print Portal
If interested in learning how to configure Print Portal, see this YouTube video. 


As Print Portal is more difficult to configure, the video is long; but goes through every step in the process to get your users, either internal employees or outside vendors, printing the labels you need.

To operate Print Portal, you’ll need an Enterprise Automation edition of Bartender; which is licensed based on the number of label printers you require.

Which edition is right for me?
The number of computers required to print labels will dictate which companion application to use.  If you wish to provide label printing in a read-only interface from more than three computers, purchase the Enterprise Automation edition of Bartender.  You will get security, ease of label printing, and some pretty heavy bragging rights too!

And contact us to help you configure Print Portal to work for you and your company.  Happy Printing!

Tim Semic
855-962-7670

Sunday, July 16, 2017

"GE"--NOT "G"

As of August 1st 2017, Epson will no longer sell the C7500G printer.  They announced end-of-life for this part number earlier this July.


C7500G
C7500G

I first wrote about the C7500G in July of 2015:


And wrote about one of our first customers, NIC Industries, using the C7500G:


Instead of the C7500G, Epson will sell the C7500GE.  The “GE” is a printer bundle: including the C7500G printer, a single user license of Wasatch SoftRIP, one year of on-site service for the printer, and 6 months of free support for Wasatch SoftRIP.  Learn more about the GE printer bundle, including the Wasatch RIP here:


With the SoftRIP, you get better color control; especially important when trying to color match.  For example, you may use it to match specified Pantone numbers, to match more closely the color printed on a label to the original artwork.  However, you don’t have to use the SoftRIP to print to the C7500G.  You can print to the C7500G from most if not all Windows based applications.

Wasatch SoftRip Label Edition
Here is information from Wasatch on their Label Edition: 


For an incremental $955 for the C7500GE versus the C7500G, you get 1 year of on-site service valued at $1,029 and the Wasatch SoftRIP valued at $1,200.   Even with just the on-site service, the GE bundle is a great deal.

Personally, I believe the SoftRIP is best suited for professional printers; those individuals experience with using other RASTER IMAGE PROCESSORS (RIP) from other printing applications.  Although not difficult, using the RIP is different than printing directly from a PDF and other Window-based software programs.

So beginning August 1st, you’ll be able to purchase only the “GE” version.  But some of you may not want or need the on-site service or the RIP software.  If so, please contact us know to order your C7500G before the price goes up.  Or purchase from our store here:


Don’t forget to add 2 years of Extended Warranty with the “G”:


And a spare set of ink:


And a spare maintenance kit:


If you prefer to get the C7500GE with the one year on-site service and Wasatch SoftRip, purchase in our store here: 


Or contact us if you have any questions around printing color labels on-demand.

Guy Mikel