This week something happened that makes me want to “blow our own
horn”. Maybe we’re boasting, but I’m
very happy by how we supported a client this week. Let me tell you more.
 |
| 1" Labels-Print & Apply |
We’ve been selling to several customers 1” wide labels for printing
with the C7500 and C7500G. What makes
this fact interesting is the minimum print width on the C7500G is 2”. Please see this post for more information:
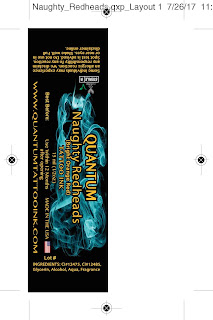
For this customer, we created a 1” label centered on a 2” liner. And it worked perfectly.
 |
| 1" Wide Label-2" Total Construction |
In addition, this customer uses basically all black artwork. And black is the most difficult color by
far. Here is what we’re recommending for
all black labels:
After several months, the customer purchased an automatic label
applicator from Label-On; The Label-On Mini 500 Tabletop applicator:
This applicator, however, would not allow us to account for the .5”
liner on the “bottom” side of the label.
Normally, exposed liners are approximately only 3 mm or less. Attempting to apply the 1” labels centered,
we would have place them above the start of the taper on the bottle. Therefore we had to move the label from the
center.
To make this change, we changed the die to make the labels, placing it
on one side; and making the exposed liner basically on 1 side.
 |
| 1" Wide Label-One Side Justified |
It was very difficult to come to agreement, however, on which side to
place the label. We had to account not
only for the applicator placement of the label, but also the fact the labels
would be rewound to place on the applicator.
It may not sound complex, but this requirement led to a great deal of
discussion. And some worry on my part.
Once the labels were manufactured, our customer tested them; and found
the labels did not print at all correct.
They were still centered on the 2” label. Frankly, I had forgotten to tell the customer
of the need to redo the artwork. Tim,
our Support Manager, figured this out quickly. But was still “nerve-wracking”
for me.
To support our customer, we quickly recreated labels the labels adding
the extra liner and bleed.
 |
| 1" Wide Label PDF- 2" Total Construction |
Once we had the new artwork, the label printed close to perfect; we had
to move horizontally the label to print full-bleed. A slim line of white was exposed on one
side. Using the horizontal alignment
feature in the C7500G driver and changing slightly the media size, the label
printed perfectly. And the rewinder
worked as expected. Watch us print and
rewind here:
More important to me, the label worked on the applicator:
 |
| C7500G Printed 1" Wide Label Applied By Applicator |
Watch the Mini 500 Tabletop apply these 1” labels onto the bottle
perfectly.
Reading this post, it may not sound like much. But getting this label design to work correctly
was a lot of effort. And I appreciate
the patience the customer showed during this process.
If you want to print 1” wide labels or any other difficult or special
color labels on-demand, contact us.
We’ll help you create the solution that meets your requirements.
Guy Mikel
855-962-7670
No comments:
Post a Comment