Pages

Monday, March 23, 2020

Streaks No More


Streaks or Streaking is the “bane of the existence” of an operator of an inkjet label printer.
Streaks From QL-120
Streaks From QL-120 Label Printer
Typically, vertical streaks occur when a printhead nozzles get clogged and stop working, but can also be caused by head alignment and paper feed issues. To eliminate the streaks, Quick Label recommends cleaning and/or replacing the printhead of Kiaro or QL-120 printers.


QL-120 Clogged Nozzles
QL-120 Non Functioning Nozzles

QL-120 Clogged Nozzles

However, replacing a Kiaro or QL-120 printhead may get expensive.  $699 per channel and up to $2,796 to replace all four.

And in my personal experience, this still may not completely remove the streaks, especially when printing artwork that is 100% covered with ink, due to paper feed and head alignment issues mentioned earlier.


QL-120 Print Output With Streaks
Instead of attempting to cure streaking issues, another option is to design a label printer that can correct or eliminate streaking automatically.  This idea is what Epson has seemingly done with the C6000 label printer series.

C6500 Color Label Printer
I got this idea by watching the printhead of the C6500 move/work.  By comparing the print speed settings, you can see a difference in number of passes/overlap and print resolution.  Watch the difference between Max Speed, Speed, Normal, Quality and Max Quality setting of the C6500 print two, 4” x 6” labels.


And not a streak in sight on these labels.

C6500 Labels With No Streaks
To confirm my ideas, I contacted Andy Scherz, Product Manager Epson to learn more about the overlap capability of the C6500 printer.


According to Andy, “Epson has a lot of experience making printers that don’t streak; especially the high-resolution photo printers.  The best way for me to explain how the C6500 works is to compare to other printers.”

Continuing, Andy says, “the C3500 prints basically 1" at a time” by moving the printhead left to right, then another inch followed by right to left.  At the intersection between this printing, a banding effect may occur if the ink spray doesn’t overlap exactly correct.  In the C3500 driver, you can adjust for this banding effect; but it takes time. Since the C3500 was introduced, the Epson driver/firmware was updated to add a “Quality Mode 2” setting that makes 2 ¼ passes on average which greatly improves print quality.”  After selling and installing 1,000+ of the C3500 printers, the effect of this setting was news to me. Everyone with a C3500 should consider changing/testing the Mode 2 settings!

“Comparing the C7500” says Andy, “Epson uses the new Precision Core technology that produces precise dots/pixels of color.  These precise dots produce better image quality than other types of older, inkjet printers.  Using an analogy, it’s like shooting a rifle compared to shotgun; a very precise dot with the Precision Core based printers.”

Even with this new technology, the C7500 may leave “print artifacts”. First, an inkjet nozzle may get plugged and leave a vertical streak.  The C7500 uses a “waterfall” type of printhead, which means the printhead does not move.  If a nozzle gets plugged, the C7500 can find the plugged nozzle and attempt to compensate to correct the print (dot substitution).  I understand it takes more than one plugged nozzle to notice streaking in the C7500.  An operator can attempt to unplug the nozzle first by using the Cleaning function, then try to remove air in the ink lines from the Maintenance menu from the front LED screen.

Second, as the C7500 prints so fast, localized wind as the media moves through the printer may create print artifacts.  I’ve found by moving the Color Mode Ink Profile to “Dark” improves this issue significantly.

C7500 Ink Profile Setting
Comparing the C7500 to other printers, Andy says, “printheads in other label printers are not as durable as the Precision Core. Therefore, they need to be replaced frequently; and as they fail, the number of streaks increase.  Further, the pixels look more like a “splat” up close rather than a precise dot with Precision Core.”

The C6500 has both similarities and differences to the C3500 and the C7500 printer.  First the C6500 uses the new Precision core technology like the C7500 producing very fine print resolution.  Second, the printer overlaps when printing, but potentially much better than the C3500.

In my discussions with Andy, I learned the following about the C6500:

  •  The media is stopped during printing eliminating wind effects.
  •  The C6500 then uses special overlap patterns of head and paper feeding to eliminate streaking. 
  • In Normal mode, average overlap is 2.5 passes.  In Max Quality mode, the average overlap is 12 passes.  This overlap means that when a nozzle is plugged, other nozzles can easily compensate for the issue.  Further, the multi-pass patterns averages out any feed or alignment imperfections virtually eliminating streaking. 
  • In Speed and Max Speed, the C6500 does not overlap.  By combining the more precise dots from the Precision Core printhead with shifting the C,M,Y colors darker in the Color Correction dialog box.
 
C6500 Color Correction For Max Speed

Better print quality can be produced using these lower resolution/faster print speed settings.
Bottom = "Normal"; Top = "Max Speed"
Bottom “Normal” setting (About 2”/Second) with no banding; Top “Max Speed” setting with Max Color setting (about 5”/Second).


In the top, I can see slight banding.  In an attempt to improve this setting, I made a banding adjustment in the printer setting utility, including printing an adjustment sheet.

C6500 Banding Adjustment
And I did improve the banding with the adjustment.  One interesting point: I found Max Speed seemed to produce less banding than the Speed setting.

Andy says, “Normal setting will be sufficient for most organizations.  But by adjusting Max Speed, Color Correction and Banding, higher speeds can be obtained with sufficient print quality for most labels.”

With the printing overlap, operators will find the C6000 series printers easier and less costly to run; Less to no streaking and no need to replace printheads as with Kairo, QL-120, LX2000, LX900, VP485, VP495 and the 300x label printers.  And if you need faster speeds, setting changes available in the C6500 make the printer run much faster.

If you are tired of dealing with streaks in your label printing, contact us.  We’ll help make your operator’s life much better.

Guy Mikel
855-962-7670

Sunday, March 15, 2020

Printing Circles With The C6000


Printing Circles correctly can be difficult.  But one, mostly overlooked, feature of the new C6000 series of label printers from Epson is the movable gap sensor.

C6000 Movable Gap Sensor

Epson did not mention this feature in their C6000 series press release:

Epson does not mention this capability on the main C6000 product webpage:

Epson doesn’t mention this feature until the 4th page in small type in the collateral material:

C6000 Movable Gap Sensor
C6000 Movable Gap Sensor Copy
But the movable gap sensor may be the most used and important feature on the C6000; especially if you print circle labels.  Now you don’t need blackmarks on labels to print circle labels correctly.


C6500P Printed Circle Labels

This post is designed to help you start printing circle labels correctly using the new C6000 series printers by moving the gap sensor.

Most importantly, TURN OFF the printer to move the gap sensors.  And make sure the TOP/BOTTOM sensors are aligned.

C6000 Aligned Gap Sensors
The first time I tried to use the movable gap sensor feature, I failed on following both of these requirements. It took forever to figure it out; including having to read the instructions.  Find them on page 166 of the Engineering manual.

C6500 Label Detector Instructions

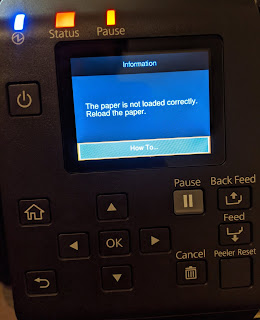
If you don’t align the sensors correctly, you get this error on the printer:

C6000 Gap Sensor Error


And in fact, I thought I had the sensors aligned correctly; but kept getting an error.  It seems sometimes the printer had issues with the movement of the gap sensors once the printer was turned back on.  I just turned it off again and adjusted the sensors to get it to work correctly.

On circles, the idea is to move the gap sensors to align with the apex of the leading edge of the circle.  To make this change, I would follow these steps:

  • Use the LED menu on the printer to adjust the media settings to the new label (I recommend using the LED menu on this printer and not the driver).
    • Media Type: Matte Paper, etc.
    • Media Detect: Gap or Blackmark
    • Media Source: Internal or Rear Feed
    • Media Form: Roll or Fanfold
  • Turn off the printer
  • Load the new label media to set the widths of the guides; then remove
  • Move the gap sensors to the center of the new label media.
  • Turn on printer. 
  • Load label media


C6500 Gap Sensor Set Correctly

To print circles, especially multiple up circles, I recommend using BarTender.  This label creation and printing software makes circle label printing much easier to do than with static PDF’s or other file types.  With BarTender, I can adjust easily the settings for printing circles; such as rows/columns of labels and gap between:
BarTender Circle Settings

In addition, you can embed the image in the background and easily add an “overhang” to the print, which makes printing full-bleed much easier to do.

BarTender Background Image Overhang
 Using this feature in BarTender, I recommend you set the template as the same size as the actual label.


BarTender Label and Template Size
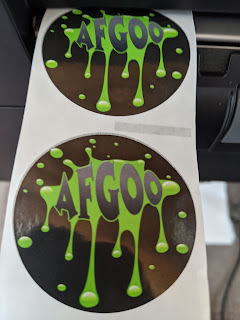
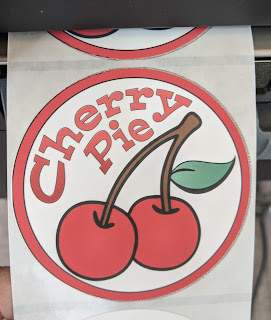
With BarTender and the movable gap sensor, I printed 1” 2 Up circle label above earlier in the post, and 2” circle labels:

2" Circle Labels
2" Circle Labels 
And 1” clear film circles 6 UP using the blackmark sensor:

1" Clear Film  Circle 6 UP Labels
1" Clear Film  Circle 6 UP Labels
(FYI: the minimum 1" print width feature of the C6000 series eliminates the need to print small sizes multiple up!)

During an attempt to print circle labels with a blackmark directly between (Kiaro and QL-120 require this blackmark location), I learned the gap sensor would not function.  The blackmark affected the reading of the gap.  By changing to the blackmark sensing, I could print 3” circles as well.


3" Circle Label Using Blackmark

All of the different sizes and especially the blackmark in the middle of the gap required me to change the print start position; both vertically and horizontally.  To change the print start position, go into the printer setting utility and select the vertical or horizontal setting.

C6500 Vertical Start Position

Please know; the C6000 series offers a great deal of mobility in terms of the movement of the vertical print start position.  For example, more than a .25” with the label with the blackmark directly between the labels.  However, the C6000 series is limited to .06” horizontal movement; which sometimes is not sufficient to print full bleed.  If the horizontal movement is insufficient for full bleed, try reloading the labels or adjusting the artwork to achieve full-bleed on both sides.

Printing circles correctly can be difficult and frustrating; trust me I know.  But the movable gap sensor on the C6000 printer makes printing these labels much easier to do.  Purchase the C6000 Series Label Printers here.

Or contact us to discuss how the C6000 series printers can make your work life easier.

Guy Mikel
855-962-7670
info@colorlabelsolutions.com 

Friday, March 13, 2020

PAC5 Color Label Printer Applicator


I am pleased to announce the PAC5, color label printer applicator from General Data Automation.

PCT5 Color Printer/Applicator

The PAC5 is the first table top color print and apply machine designed to make label printing and applying easier and simpler to do.    After sending a job to the printer and placing a package under tamp head, the PAC5 triggers the start of the application process.  The PAC5 prints, feeds a label on to the pad and extends the dual tamps to apply the label.  Once the label is applied, the PAC5 retracts the tamps allowing the operator to remove the package and repeat the cycle.

PCT5 Color Printer/Applicator
PCT5 Color Printer/Applicator In Action
The PAC5 was created by John Roberts, Vice President of General Data Automation.  According to John, “we started with a flat package applicator but will adding a round package applicator in the future.  With the flat package applicator, we can provide a jig to hold the package in place to ensure the label is placed in the same place every time. And for many potential customers, the benefit of applying labels in the same place every time is a crucial aspect of the packaging esthetics.”

The PAC5 has two different operation modes; Batch and On-Demand.  In the Batch mode, the operator sends a print job to the printer.  The printer prints and presents a label placing it on the tamp pad.  As the operator moves a flat package underneath the tamp, a sensor triggers the applicator to apply the label.  John says, “the sensor speeds up the label application, initiating the process.  No need to press a foot pedal or pull a lever.  In Batch mode, the operator doesn’t have to wait for the printer to produce the label.”

Batch Mode is designed where an operator wants to print a series of identical labels; where lot numbers, production dates, best-buy dates, etc. don’t change.  Further, the PAC5 in batch mode eliminates the need to rewind the printed labels, saving significant time and money.  For most customers, I believe, PAC5 will be used in Batch mode.

Color Printed Label With Variable Data

On-Demand mode is designed for situations where the operator must keep a 1:1 relationship with the label and package.  John says, “for those situations where labels must be serialized/sequentially numbered, the On-Demand mode works the best.  In this mode, the printer produces and presents the label after the package is placed underneath the tamp.  This way the operator can ensure the correct label is placed on the package, with the correct date, numbers, etc.”.

Watch the PAC5 in On-Demand mode operate here:


The PAC5 uses the C6000 series label printers.  One feature of these printers makes the PAC5 possible; peel and present.  Learn more about these printers here:


The PAC5 comes standard with many features that are upgrades from other machine builders; including a 5 color status indicator,  On / Off Switch, Jog Button, Lock Out /Tag Out Main Disconnect, Adjustable Level Feet, and Out of Media Detection.


If desired, we can support the deployment of the PAC5 with jig creation, on-site training, return to depot service, label creation software (BarTender, Nicelabel, etc.) and of course labels.  Our goal is to make the PAC5 improve your overall operation.

If you believe the PAC5 would improve your operations, contact us to discuss your requirements.  Plan on sending us packaging and label sizes/material to test to ensure the printer/applicator works for you.

It’s great selling unique, new products that fit our on-demand color label market.  Contact us to learn more about the PAC5 and printing color labels on-demand.

Guy Mikel
855-962-7670